Mulesoft 简明教程
MuleSoft - Creating First Mule Application
在本章中,我们将在 MuleSoft 的 Anypoint Studio 中创建我们的第一个 Mule 应用程序。要创建它,首先我们需要启动 Anypoint Studio。
In this chapter we are going to create our first Mule application in MuleSoft’s Anypoint Studio. For creating it, first we need to launch Anypoint Studio.
Launching Anypoint Studio
单击 Anypoint Studio 以启动它。如果您是第一次启动它,那么您将看到以下窗口−
Click on Anypoint Studio to launch it. If you are launching it for first time, then you will see the following window −

User Interface of Anypoint Studio
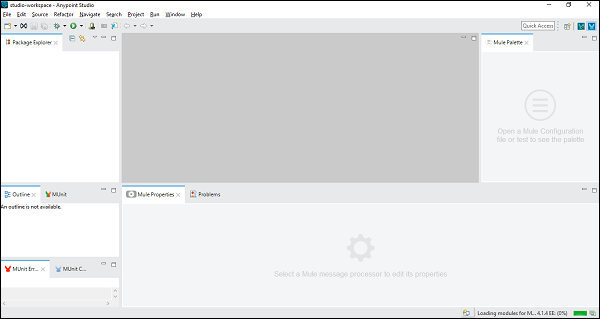
一旦您单击“转到工作区”按钮,它将引导您转到 Anypoint Studio 的用户界面如下所示−
Once you Click on the Go to Workspace button, it will lead you to the user interface of Anypoint Studio as follows −
Steps for Creating Mule Application
要创建 Mule 应用程序,请按照以下步骤操作−
In order to create your Mule application, follow the below steps −
Creating New Project
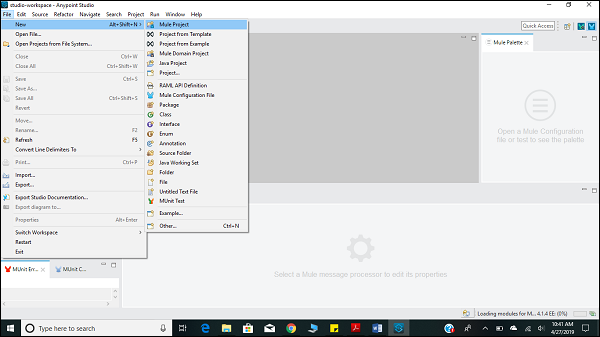
创建 Mule 应用程序的第一步是创建一个新项目。它可以通过按照 FILE → NEW → Mule Project 中所示的路径完成,如下所示−
The very first step for creating Mule application is to create a new project. It can be done by following the path FILE → NEW → Mule Project as shown below −
Naming the Project
按照上述说明,在单击“新建 Mule 项目”之后,将打开一个新窗口,询问项目名称和其他规范。输入项目名称“ TestAPP1 ”,然后单击完成按钮。
After clicking on the new Mule Project, as described above, it will open a new window asking for the project name and other specifications. Give the name of the Project, ‘TestAPP1’ and then click on the finish button.

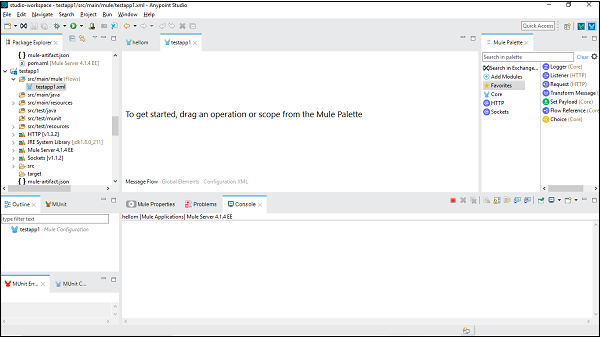
单击完成按钮后,将打开为 MuleProject 建立的工作区,即 ‘TestAPP1’ 。您可以看到前一章中描述的所有 Editors 和 Views 。
Once you click on the Finish Button, it will open the workspace built for your MuleProject namely ‘TestAPP1’. You can see all the Editors and Views described in the previous chapter.
Configuring the Connector
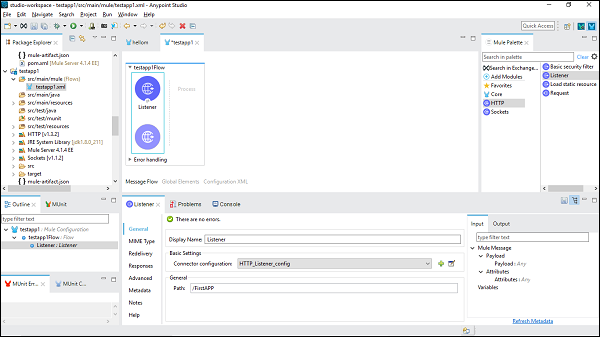
在此,我们将为 HTTP Listener 构建一个简单的 Mule 应用程序。为此,我们需要从 Mule Palette 拖动 HTTP Listener 连接器并将其放到工作区,如下所示 −
Here, we are going to build a simple Mule application for HTTP Listener. For this, we need to drag the HTTP Listener connector from Mule Palette and drop it to the workspace as shown below −

现在,我们需要配置它。如上所示,在基本设置下,单击连接器配置之后的绿色 + 号。
Now, we need to configure it. Click on the green color + sign after Connector configuration under Basic Settings as shown above.
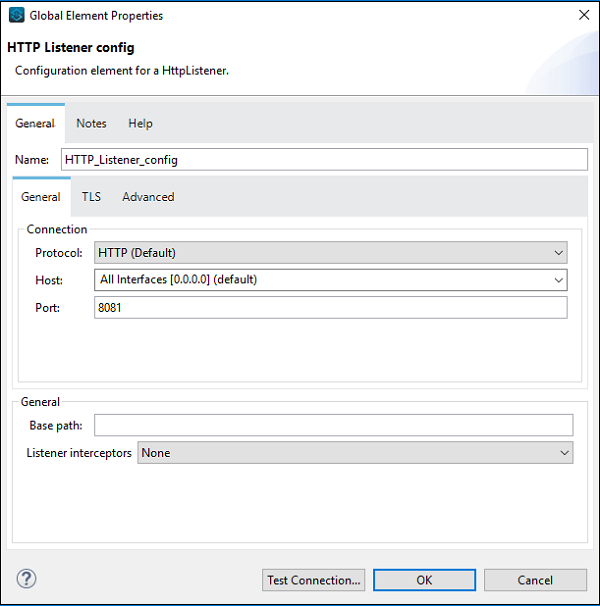
单击确定后,将转到 HTTP Listener 属性页面。现在我们需要在常规选项卡下提供路径。在此特定示例中,我们已 /FirstAPP 提供为路径名称。
On clicking ok, it will take you back on HTTP Listener property page. Now we need to provide the path under General Tab. In this particular example, we have provided /FirstAPP as path name.
Configuring Set Payload Connector
现在,我们需要使用 Set Payload 连接器。我们还需要在设置选项卡下提供其值,如下所示 −
Now, we need to take a Set Payload connector. We also need to give its value under Settings tab as follows −
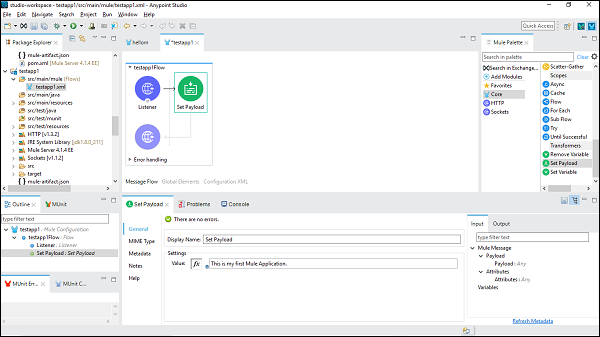
This is my first Mule Application ,是本示例中提供的名称。
This is my first Mule Application, is the name provided in this example.
Running Mule Application
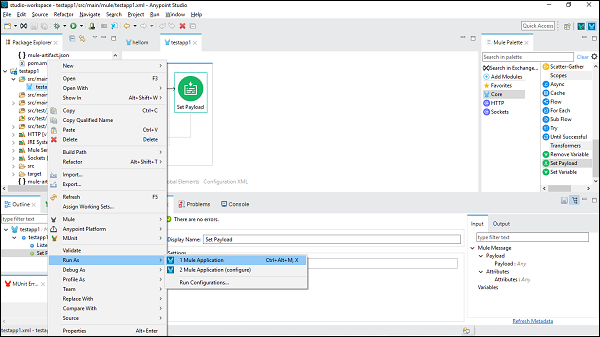
现在,将其保存并单击 Run as Mule Application ,如下所示 −
Now, save it and click Run as Mule Application as shown below −
我们可以在控制台中进行检查,以下是其部署应用程序的方式 −
We can check it under Console which deploys the application as follows −
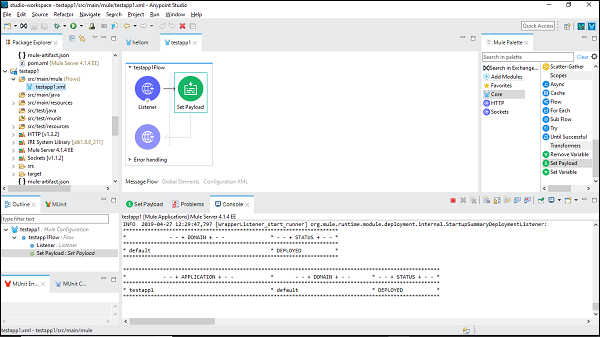
它显示您已成功构建您的第一个 Mule 应用程序。
It shows that you have successfully built your first Mule Application.
Verifying Mule Application
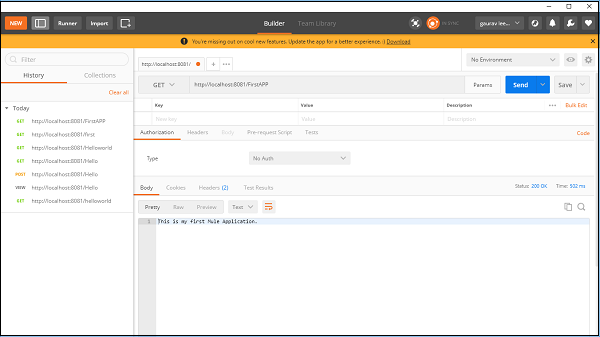
现在,我们需要测试我们的应用程序是否正在运行。 Go to POSTMAN ,一个 Chrome 应用程序并输入 URL: http:/localhost:8081 。它显示我们构建 Mule 应用程序时提供的消息,如下所示:-
Now, we need to test whether our app is running or not. Go to POSTMAN, a Chrome app and enter the Url: http:/localhost:8081. It shows the message we have provided while building Mule application as shown below −
