Python Forensics 简明教程
Python Forensics - Introduction
Python 是一种通用编程语言,具有易于阅读的代码,专业开发人员和新手程序员都可以轻松理解。Python 由许多有用的库组成,可与任何堆栈框架一起使用。许多实验室依赖于 Python 来构建用于预测的基本模型和进行实验。它还有助于控制关键的操作系统。
Python 具有内置功能,可在调查期间支持数字调查和保护证据的完整性。在本教程中,我们将解释将 Python 应用于数字或计算取证的基本概念。

Python Forensics - Installation of Python
由于我们在所有计算法医学活动中都需要 Python,让我们逐步进行并了解如何安装它。
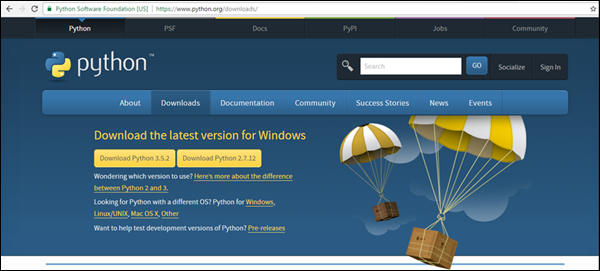
Step 1 − 转到 https://www.python.org/downloads/ 并根据系统上的操作系统下载 Python 的安装文件。
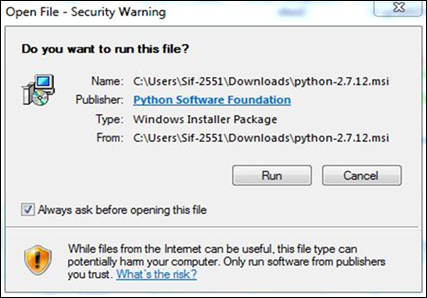
Step 2 − 下载软件包/安装程序后,点击 exe 文件启动安装过程。
安装完成之后,你将看到以下界面。

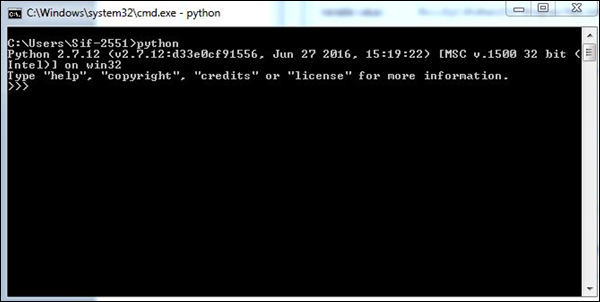
Step 3 − 接下来的步骤是设置系统中的 Python 环境变量。

Step 4 − 设置环境变量后,在命令提示符中输入命令“python”以验证安装是否成功。
如果安装成功,那么你将看到控制台上的以下输出。
Python Forensics - Overview of Python
Python 编写的代码看起来与 C 或 Pascal 等其它传统编程语言编写的代码非常相似。也有人说 Python 的语法借鉴了 C。这包括许多与 C 语言相似的 Python 关键字。
Python 包含条件和循环语句,可用于准确提取数据以进行取证。对于流程控制,它提供了 if/else 、 while 和一个高级 for 语句,该语句循环访问任何“可迭代”对象。
if a < b:
   max = b
else:
   max = a
Python 与其他编程语言不同之处在于它使用 dynamic typing 。它使用引用对象的变量名。无需声明这些变量。
Data Types
Python 包含一组内置数据类型,如字符串、布尔值、数字等。还有一些不可变的类型,这意味着在执行过程中不能更改这些值。
Python 还具有复合内置数据类型,包括 tuples ,它们是不可变数组, lists 和 dictionaries ,它们是哈希表。它们全部用于数字取证,以便在收集证据时存储值。

Python Forensics - Basic Forensic Application
要按照法医学准则创建应用程序,了解和遵循其命名约定和模式非常重要。
Naming Conventions
在 Python 法医学应用程序开发过程中,需要遵循的规则和约定在以下表格中予以说明。
Constants |
Uppercase with underscore separation |
HIGH_TEMPERATURE |
Local variable name |
使用波浪大写字母的小写形式(下划线为可选) |
currentTemperature |
Global variable name |
使用波浪大写字母作为前缀的 gl 小写形式(下划线为可选) |
gl_maximumRecordedTemperature |
Functions name |
使用波浪大写字母的大写形式(下划线可选),并采用主动语态 |
ConvertFarenheitToCentigrade(…) |
Object name |
使用波浪大写字母作为前缀的 ob_ 小写形式 |
ob_myTempRecorder |
Module |
下划线后接波浪大写字母的小写形式 |
_tempRecorder |
Class names |
使用前缀 class_,然后使用波浪大写字母,并保持简洁 |
class_TempSystem |
我们举个例子来了解命名约定在计算法医学中的重要性。假设我们有通常用于加密数据的哈希算法。单向哈希算法采用二进制数据流作为输入;它可以是密码、文件、二进制数据或任何数字数据。然后,哈希算法针对接收到的输入数据生成 message digest (md)。
实际上,不可能创建将生成给定消息摘要的新二进制输入。如果更改二进制输入数据中的一位,它也会生成一个唯一的消息,该消息与前一个不同。
Example
看看以下遵循上述约定的示例程序。
import sys, string, md5   # necessary libraries
print "Please enter your full name"
line = sys.stdin.readline()
line = line.rstrip()
md5_object = md5.new()
md5_object.update(line)
print md5_object.hexdigest()   # Prints the output as per the hashing algorithm i.e. md5
exit
上述程序生成以下输出。

在此程序中,Python 脚本接受输入(你的全名),并且按照 md5 哈希算法转换它。它加密数据并保护信息,如果需要。根据法医指南,证据的名称或任何其它证据可以按照这个模式进行保护。
Python Forensics - Hash Function
hash function 被定义为函数,它映射到固定长度的大量数据,该函数确保相同的输入会生成相同的输出,而这实际上定义为哈希和。哈希和包含特定信息的一部分特征。
这个函数实际上不可能被还原。因此,任何第三方攻击(例如暴力破解攻击)在实际上是不可能的。而且,这种算法被称为 one-way cryptographic algorithm 。
一个理想的密码哈希函数具有四个主要的属性:
-
它一定很容易为任何给定的输入计算哈希值。
-
生成原始的输入从它的哈希是不可能的。
-
修改输入而不改变哈希是不可能的。
-
找到具有相同哈希的两个不同的输入是不可能的。
Example
考虑以下示例,它有助于使用十六进制格式的字符来匹配密码。
import uuid
import hashlib

def hash_password(password):
   # userid is used to generate a random number
   salt = uuid.uuid4().hex #salt is stored in hexadecimal value
   return hashlib.sha256(salt.encode() + password.encode()).hexdigest() + ':' + salt

def check_password(hashed_password, user_password):
   # hexdigest is used as an algorithm for storing passwords
   password, salt = hashed_password.split(':')
   return password == hashlib.sha256(salt.encode()
      + user_password.encode()).hexdigest()

new_pass = raw_input('Please enter required password ')
hashed_password = hash_password(new_pass)
print('The string to store in the db is: ' + hashed_password)
old_pass = raw_input('Re-enter new password ')

if check_password(hashed_password, old_pass):
   print('Yuppie!! You entered the right password')
else:
   print('Oops! I am sorry but the password does not match')

Python Forensics - Cracking an Encryption
在本章中,我们将了解如何在分析和证据期间破解提取的文本数据。
密码学中的纯文本是一些正常的可读文本,例如一条消息。另一方面,密文是由输入纯文本后提取的加密算法的输出。
我们将纯文本信息转换成密文的简单算法是凯撒密码,朱利叶斯·凯撒发明用于将纯文本保密以防御他的敌人。这个密码涉及通过将信息中的每个字母在字母表中“向前”移动三个位置。
以下是一个演示说明。
a → D
b → E
c → F
w → Z
x → A
y → B
z → C
Example
A message entered when you run a Python script gives all the possibilities of characters, which is used for pattern evidence.
The types of pattern evidences used are as follows −
-
Tire Tracks and Marks
-
Impressions
-
Fingerprints
Every biometric data comprises of vector data, which we need to crack to gather full-proof evidence.
The following Python code shows how you can produce a cipher text from plain text −
import sys

def decrypt(k,cipher):
   plaintext = ''

   for each in cipher:
      p = (ord(each)-k) % 126

      if p < 32:
         p+=95
         plaintext += chr(p)
         print plaintext

def main(argv):
   if (len(sys.argv) != 1):
      sys.exit('Usage: cracking.py')
      cipher = raw_input('Enter message: ')

      for i in range(1,95,1):
         decrypt(i,cipher)

if __name__ == "__main__":
   main(sys.argv[1:])
Python Forensics - Virtualization
Virtualization is the process of emulating IT systems such as servers, workstations, networks, and storage. It is nothing but the creation of a virtual rather than actual version of any operating system, a server, a storage device or network processes.
The main component which helps in emulation of virtual hardware is defined as a hyper-visor.
The following figure explains the two main types of system virtualization used.

Virtualization has been used in computational forensics in a number of ways. It helps the analyst in such a way that the workstation can be used in a validated state for each investigation. Data recovery is possible by attaching the dd image of a drive as a secondary drive on a virtual machine particularly. The same machine can be used as a recovery software to gather the evidences.
The following example helps in understanding the creation of a virtual machine with the help of Python programming language.
Step 1 − Let the virtual machine be named 'dummy1'.
Every virtual machine must have 512 MB of memory in minimum capacity, expressed in bytes.
vm_memory = 512 * 1024 * 1024Step 2 − The virtual machine must be attached to the default cluster, which has been calculated.
vm_cluster = api.clusters.get(name = "Default")Step 3 − The virtual machine must boot from the virtual hard disk drive.
vm_os = params.OperatingSystem(boot = [params.Boot(dev = "hd")])All the options are combined into a virtual machine parameter object, before using the add method of the vms collection to the virtual machine.
Example
Following is the complete Python script for adding a virtual machine.
from ovirtsdk.api import API #importing API library
from ovirtsdk.xml import params

try: #Api credentials is required for virtual machine
   api = API(url = "https://HOST",
      username = "Radhika",
      password = "a@123",
      ca_file = "ca.crt")

   vm_name = "dummy1"
   vm_memory = 512 * 1024 * 1024 #calculating the memory in bytes
   vm_cluster = api.clusters.get(name = "Default")
   vm_template = api.templates.get(name = "Blank")

   #assigning the parameters to operating system
   vm_os = params.OperatingSystem(boot = [params.Boot(dev = "hd")])

   vm_params = params.VM(name = vm_name,
      memory = vm_memory,
      cluster = vm_cluster,
      template = vm_template
      os = vm_os)

   try:
      api.vms.add(vm = vm_params)
      print "Virtual machine '%s' added." % vm_name #output if it is successful.
   except Exception as ex:
      print "Adding virtual machine '%s' failed: %s" % (vm_name, ex)
      api.disconnect()

except Exception as ex:
   print "Unexpected error: %s" % ex
Python Forensics - Network Forensics
The scenario of modern network environments is such that investigating can be fraught due to a number of difficulties. This can happen whether you are responding to a breach support, investigating insider activities, performing assessments related to vulnerability, or validating a regulatory compliance.
Concept of Network Programming
The following definitions are used in network programming.
-
Client − Client is a part of client-server architecture of network programming which runs on a personal computer and workstation.
-
Server − The server is a part of client-server architecture that provides services to other computer programs in the same or other computers.
-
WebSockets − WebSockets provide a protocol between the client and the server, which runs over a persistent TCP connection. Through this, bi-directional messages can be sent between the TCP socket connection (simultaneously).
WebSockets come after many other technologies that allow the servers to send information to the client. Other than handshaking the Upgrade Header, WebSockets is independent from HTTP.

These protocols are used to validate the information which is sent or received by the third party users. As encryption is one of the methods used for securing messages, it is also important to secure the channel through which the messages have been transferred.
Consider the following Python program, which the client uses for handshaking.
Example
# client.py
import socket

# create a socket object
s = socket.socket(socket.AF_INET, socket.SOCK_STREAM)

# get local machine name
host = socket.gethostname()
port = 8080

# connection to hostname on the port.
s.connect((host, port))

# Receive no more than 1024 bytes
tm = s.recv(1024)
print("The client is waiting for connection")
s.close()
Output
It will produce the following output −

The server accepting the request for communication channel will include the following script.
# server.py
import socket
import time

# create a socket object
serversocket = socket.socket(socket.AF_INET, socket.SOCK_STREAM)

# get local machine name
host = socket.gethostname()
port = 8080

# bind to the port
serversocket.bind((host, port))

# queue up to 5 requests
serversocket.listen(5)

while True:
   # establish a connection
   clientsocket,addr = serversocket.accept()
   print("Got a connection from %s" % str(addr))
   currentTime = time.ctime(time.time()) + "\r\n"
   clientsocket.send(currentTime.encode('ascii'))
   clientsocket.close()
The client and server created with the help of Python programming listen to the host number. Initially, the client sends a request to the server with respect to data sent in the host number and the server accepts the request and sends a response immediately. This way, we can have a secure channel of communication.
Python Forensics - Python Modules
Modules in Python programs help in organizing the code. They help in grouping related code into a single module, which makes it easier to understand and use. It includes arbitrarily named values, which can be used for binding and reference. In simple words, a module is a file consisting of Python code which includes functions, classes, and variables.
The Python code for a module (file) is saved with .py extension which is compiled as and when needed.
Example
def print_hello_func( par ):
   print "Hello : ", par
   return
Import Statement
The Python source file can be used as a module by executing an import statement which imports other packages or third-party libraries. The syntax used is as follows −
import module1[, module2[,... moduleN]When the Python interpreter encounters the import statement, it imports the module specified which is present in the search path.
Example
Consider the following example.
#!/usr/bin/python

# Import module support
import support

# Now you can call defined function that module as follows
support.print_func("Radhika")
It will produce the following output −

A module is loaded only once, regardless of the number of times it has been imported by Python code.
From…import statement
From attribute helps to import specific attributes from a module into a current namespace. Here is its syntax.
from modname import name1[, name2[, ... nameN]]Example
To import the function fibonacci from the module fib, use the following statement.
from fib import fibonacciLocating Modules
When the module is being imported, the Python interpreter searches for the following sequences −
-
The current directory.
-
If the module does not exist, Python then searches each directory in the shell variable PYTHONPATH.
-
If the shell variable location fails, Python checks the default path.
Computational forensics use Python modules and third-party modules to get the information and extract evidence with better ease. Further chapters focus on the implementation of modules to get the necessary output.
Python Forensics - Dshell and Scapy
DShell
Dshell is a Python-based network forensic analysis toolkit. This toolkit was developed by the US Army Research Laboratory. The release of this open source toolkit was in the year 2014. The major focus of this toolkit is to make forensic investigations with ease.
The toolkit consists of large number of decoders which are listed in the following table.
Sr.No. |
Decoder Name & Description |
1 |
dns This is used to extract DNS related queries |
2 |
reservedips Identifies the solutions for DNS problems |
3 |
large-flows Listing of the netflows |
4 |
rip-http It is used extract the files from the HTTP traffic |
5 |
Protocols Used for identification of non-standard protocols |
The US Army Laboratory has maintained the clone repository in GitHub in the following link −

The clone consists of a script install-ubuntu.py () used for installation of this toolkit.
Once the installation is successful, it will automatically build the executables and dependencies that will be used later.
The dependencies are as follows −
dependencies = {
   "Crypto": "crypto",
   "dpkt": "dpkt",
   "IPy": "ipy",
   "pcap": "pypcap"
}
This toolkit can be used against the pcap (packet capture) files, which is usually recorded during the incidents or during the alert. These pcap files is either created by libpcap on Linux platform or WinPcap on Windows platform.
Scapy
Scapy is a Python-based tool used to analyze and manipulate the network traffic. Following is the link for Scapy toolkit −
This toolkit is used to analyze packet manipulation. It is very capable to decode packets of a wide number of protocols and capture them. Scapy differs from the Dshell toolkit by providing a detailed description to the investigator about network traffic. These descriptions have been recorded in real time.
Scapy has the ability to plot using third-party tools or OS fingerprinting.
Consider the following example.
import scapy, GeoIP #Imports scapy and GeoIP toolkit
from scapy import *
geoIp = GeoIP.new(GeoIP.GEOIP_MEMORY_CACHE) #locates the Geo IP address
def locatePackage(pkg):
src = pkg.getlayer(IP).src #gets source IP address
dst = pkg.getlayer(IP).dst #gets destination IP address
srcCountry = geoIp.country_code_by_addr(src) #gets Country details of source
dstCountry = geoIp.country_code_by_addr(dst) #gets country details of destination
print src+"("+srcCountry+") >> "+dst+"("+dstCountry+")\n"
This script gives the detailed description of the country details in the network packet, who are communicating with each other.
The above script will produce the following output.

Python Forensics - Searching
Searching is certainly one of the pillars of forensic investigation. Nowadays, search is only as good as the investigator who is running the evidence.
Searching a keyword from the message plays a vital role in forensics, when we search for an evidence with the help of a keyword. The knowledge of what is to be searched in a particular file along with the ones in deleted files requires both experience and knowledge.
Python has various built-in mechanisms with standard library modules to support search operation. Fundamentally, investigators use the search operation to find answers to questions such as "who", "what", "where", "when", etc.
Example
In the following example, we have declared two strings and then, we have used the find function to check whether the first string contains the second string or not.
# Searching a particular word from a message
str1 = "This is a string example for Computational forensics of gathering evidence!";
str2 = "string";

print str1.find(str2)
print str1.find(str2, 10)
print str1.find(str2, 40)
The above script will produce the following output.

“find” function in Python helps in searching a keyword in a message or a paragraph. This is critical in collecting appropriate evidence.
Python Forensics - Indexing
Indexing actually provides the investigator have a complete look at a file and gather potential evidence from it. The evidence could be contained within a file, a disk image, a memory snapshot, or a network trace.
Indexing helps in reducing time for time-consuming tasks such as keyword searching. Forensic investigation also involves interactive searching phase, where the index is used to rapidly locate keywords.
Indexing also helps in listing the keywords in a sorted list.
Example
The following example shows how you can use indexing in Python.
aList = [123, 'sample', 'zara', 'indexing'];

print "Index for sample : ", aList.index('sample')
print "Index for indexing : ", aList.index('indexing')

str1 = "This is sample message for forensic investigation indexing";
str2 = "sample";

print "Index of the character keyword found is "
print str1.index(str2)
The above script will produce the following output.

Python Forensics - Python Imaging Library
Extracting valuable information from the resources available is a vital part of digital forensics. Getting access to all the information available is essential for an investigation process as it helps in retrieving appropriate evidence.
Resources that contain data can be either simple data structures such as databases or complex data structures such as a JPEG image. Simple data structures can be easily accessed using simple desktop tools, while extracting information from complex data structures require sophisticated programming tools.
Python Imaging Library
The Python Imaging Library (PIL) adds image processing capabilities to your Python interpreter. This library supports many file formats, and provides powerful image processing and graphics capabilities. You can download the source files of PIL from: http://www.pythonware.com/products/pil/
The following illustration shows the complete flow diagram of extracting data from images (complex data structures) in PIL.

Example
Now, let’s have a programming example to understand how it actually works.
Step 1 − Suppose we have the following image from where we need to extract information.

Step 2 − When we open this image using PIL, it will first note the necessary points required for extracting evidence, which includes various pixel values. Here is the code to open the image and record its pixel values −
from PIL import Image
im = Image.open('Capture.jpeg', 'r')
pix_val = list(im.getdata())
pix_val_flat = [x for sets in pix_val for x in sets]
print pix_val_flat
Step 3 − Our code will produce the following output, after extracting the pixel values of the image.

The output delivered represents the pixel values of RGB combination, which gives a better picture of what data is needed for evidence. The data fetched is represented in the form of an array.
Python Forensics - Mobile Forensics
Forensic investigation and analysis of standard computer hardware such as hard disks have developed into a stable discipline and is followed with the help of techniques to analyze non-standard hardware or transient evidence.
Although smartphones are increasingly being used in digital investigations, they are still considered as non-standard.
Forensic Analysis
Forensic investigations search for data such as received calls or dialed numbers from the smartphone. It can include text messages, photos, or any other incriminating evidence. Most smartphones have screen-locking features using passwords or alphanumeric characters.
Here, we will take an example to show how Python can help crack the screen-locking password to retrieve data from a smartphone.
Manual Examination
Android supports password lock with PIN number or alphanumeric password. The limit of both passphrases are required to be between 4 and 16 digits or characters. The password of a smartphone is stored in the Android system in a special file called password.key in /data/system.
Android stores a salted SHA1-hashsum and MD5-hashsum of the password. These passwords can be processed in the following code.
public byte[] passwordToHash(String password) {

   if (password == null) {
      return null;
   }

   String algo = null;
   byte[] hashed = null;

   try {
      byte[] saltedPassword = (password + getSalt()).getBytes();
      byte[] sha1 = MessageDigest.getInstance(algo = "SHA-1").digest(saltedPassword);
      byte[] md5 = MessageDigest.getInstance(algo = "MD5").digest(saltedPassword);
      hashed = (toHex(sha1) + toHex(md5)).getBytes();
   } catch (NoSuchAlgorithmException e) {
      Log.w(TAG, "Failed to encode string because of missing algorithm: " + algo);
   }

   return hashed;
}
It is not feasible to crack the password with the help of dictionary attack as the hashed password is stored in a salt file. This salt is a string of hexadecimal representation of a random integer of 64 bit. It is easy to access the salt by using Rooted Smartphone or JTAG Adapter.
Rooted Smartphone
The dump of the file /data/system/password.key is stored in SQLite database under the lockscreen.password_salt key. Under settings.db, the password is stored and the value is clearly visible in the following screenshot.

JTAG Adapter
A special hardware known as JTAG (Joint Test Action Group) adapter can be used to access the salt. Similarly, a Riff-Box or a JIG-Adapter can also be used for the same functionality.
Using the information obtained from Riff-box, we can find the position of the encrypted data, i.e., the salt. Following are the rules −
-
Search for the associated string "lockscreen.password_salt."
-
The byte represents the actual width of the salt, which is its length.
-
This is the length which is actually searched for to get the stored password/pin of the smartphones.
These set of rules help in getting the appropriate salt data.

Python Forensics - Network Time Protocol
The most widely used protocol for synchronizing time and which has been widely accepted as a practice is done through Network Time Protocol (NTP).
NTP uses the User Datagram Protocol (UDP) which uses minimum time to communicate the packets between the server and the client who wish to synchronize with the given time source.

Features of Network Time Protocol are as follows −
-
The default server port is 123.
-
This protocol consists of many accessible time servers synchronized to national laboratories.
-
The NTP protocol standard is governed by the IETF and the Proposed Standard is RFC 5905, titled “Network Time Protocol Version 4: Protocol and Algorithms Specification” [NTP RFC]
-
Operating systems, programs, and applications use NTP to synchronize time in a proper way.
In this chapter, we will focus on the usage of NTP with Python, which is feasible from third-party Python Library ntplib. This library efficiently handles the heavy lifting, which compares the results to my local system clock.
Installing the NTP Library
The ntplib is available for download at https://pypi.python.org/pypi/ntplib/ as shown in the following figure.
The library provides a simple interface to NTP servers with the help of methods that can translate NTP protocol fields. This helps access other key values such as leap seconds.

The following Python program helps in understanding the usage of NTP.
import ntplib
import time

NIST = 'nist1-macon.macon.ga.us'
ntp = ntplib.NTPClient()
ntpResponse = ntp.request(NIST)

if (ntpResponse):
   now = time.time()
   diff = now-ntpResponse.tx_time
   print diff;
The above program will produce the following output.

The difference in time is calculated in the above program. These calculations help in forensic investigations. The network data obtained is fundamentally different than the analysis of data found on the hard drive.
The difference in time zones or getting accurate time zones can help in gathering evidence for capturing the messages through this protocol.
Python Forensics - Multiprocessing Support
Forensic specialists normally find it difficult to apply digital solutions to analyze the mountains of digital evidence in common crimes. Most digital investigation tools are single threaded and they can execute only one command at a time.
In this chapter, we will focus on the multiprocessing capabilities of Python, which can relate to the common forensic challenges.
Multiprocessing
Multiprocessing is defined as the computer system’s ability to support more than one process. The operating systems that support multiprocessing enable several programs to run concurrently.
There are various types of multiprocessing such as symmetric and asymmetric processing. The following diagram refers to a symmetric multiprocessing system which is usually followed in forensic investigation.

Example
The following code shows how different processes are listed internally in Python programming.
import random
import multiprocessing

def list_append(count, id, out_list):
   #appends the count of number of processes which takes place at a time
   for i in range(count):
      out_list.append(random.random())

   if __name__ == "__main__":
      size = 999
      procs = 2
      # Create a list of jobs and then iterate through
      # the number of processes appending each process to
      # the job list
      jobs = []

   for i in range(0, procs):
      out_list = list() #list of processes
      process1 = multiprocessing.Process(
         target = list_append, args = (size, i, out_list))

      # appends the list of processes
      jobs.append(process)

   # Calculate the random number of processes
   for j in jobs:
      j.start()  #initiate the process

   # After the processes have finished execution
   for j in jobs:
      j.join()
      print "List processing complete."
Here, the function list_append() helps in listing the set of processes in the system.

Python Forensics - Memory and Forensics
In this chapter, we will focus on investigating the volatile memory with the help of Volatility, a Python-based forensics framework applicable on the following platforms: Android and Linux.
Volatile Memory
Volatile memory is a type of storage where the contents get erased when the system’s power is turned off or interrupted. RAM is the best example of a volatile memory. It means, if you were working on a document that has not been saved to a non-volatile memory, such as a hard drive, and the computer lost power, then all the data will be lost.
In general, volatile memory forensics follow the same pattern as other forensic investigations −
-
Selecting the target of the investigation
-
Acquiring forensic data
-
Forensic analysis
The basic volatility plugins which are used for Android gathers RAM dump for analysis. Once the RAM dump is gathered for analysis, it is important to start hunting for malware in RAM.
YARA Rules
YARA is a popular tool which provides a robust language, is compatible with Perl-based Regular Expressions, and is used to examine the suspected files/directories and match strings.
In this section, we will use YARA based on the pattern matching implementation and combine them with utility power. The complete process will be beneficial for forensic analysis.
Example
Consider the following code. This code helps in extracting the code.
import operator
import os
import sys

sys.path.insert(0, os.getcwd())
import plyara.interp as interp

# Plyara is a script that lexes and parses a file consisting of one more Yara
# rules into a python dictionary representation.
if __name__ == '__main__':
   file_to_analyze = sys.argv[1]
   rulesDict = interp.parseString(open(file_to_analyze).read())
   authors = {}
   imps = {}
   meta_keys = {}
   max_strings = []
   max_string_len = 0
   tags = {}
   rule_count = 0

   for rule in rulesDict:
      rule_count += 1

   # Imports
   if 'imports' in rule:
      for imp in rule['imports']:
         imp = imp.replace('"','')

         if imp in imps:
            imps[imp] += 1
         else:
            imps[imp] = 1
   # Tags
   if 'tags' in rule:
      for tag in rule['tags']:
         if tag in tags:
            tags[tag] += 1
         else:
            tags[tag] = 1

   # Metadata
   if 'metadata' in rule:
      for key in rule['metadata']:
         if key in meta_keys:
            meta_keys[key] += 1
         else:
            meta_keys[key] = 1

         if key in ['Author', 'author']:
            if rule['metadata'][key] in authors:
               authors[rule['metadata'][key]] += 1
            else:
               authors[rule['metadata'][key]] = 1

   #Strings
   if 'strings' in rule:
      for strr in rule['strings']:
         if len(strr['value']) > max_string_len:
            max_string_len = len(strr['value'])
            max_strings = [(rule['rule_name'], strr['name'], strr['value'])]
         elif len(strr['value']) == max_string_len:
            max_strings.append((rule['rule_name'], strr['key'], strr['value']))

   print("\nThe number of rules implemented" + str(rule_count))
   ordered_meta_keys = sorted(meta_keys.items(), key = operator.itemgetter(1),
      reverse = True)
   ordered_authors = sorted(authors.items(), key = operator.itemgetter(1),
      reverse = True)
   ordered_imps = sorted(imps.items(), key = operator.itemgetter(1), reverse = True)
   ordered_tags = sorted(tags.items(), key = operator.itemgetter(1), reverse = True)
The above code will produce the following output.

The number of YARA rules implemented helps in giving a better picture of the suspected files. Indirectly, the list of suspected files help in gathering appropriate information for forensics.
Following is the source code in github: https://github.com/radhikascs/Python_yara
Python Forensics in Linux
The major concern of digital investigations is to secure important evidences or data with encryption or any other format. The basic example is storing the passwords. It is therefore necessary to understand the usage of Linux operating system for digital forensic implementation to secure these valuable data.
Information for all the local users are mostly stored in the following two files −
-
/etc/passwd
-
etc/shadow
The first one is mandatory, which stores all the passwords. The second file is optional and it stores information about the local users including the hashed passwords.
Issues arise regarding the security issue of storing the password information in a file, which is readable by every user. Therefore, hashed passwords are stored in /etc/passwd, where the content is replaced by a special value "x".
The corresponding hashes have to be looked up in /etc/shadow. The settings in /etc/passwd may override the details in /etc/shadow.
Both the text files in Linux include one entry per line and the entry consists of multiple fields, separated by colons.
The format of /etc/passwd is as follows −
Sr.No. |
Field Name & Description |
1 |
Username This field consists of the attributes of human-readable format |
2 |
Password hash It consists of the password in an encoded form according to the Posix crypt function |
If the hash password is saved as empty, then the corresponding user will not require any password to log into the system. If this field contains a value that cannot be generated by the hash algorithm, such as an exclamation mark, then the user cannot log on using a password.
A user with a locked password can still log on using other authentication mechanisms, for example, SSH keys. As mentioned earlier, the special value "x" means that the password hash has to be found in the shadow file.
The password hash includes the following −
-
Encrypted salt − The encrypted salt helps maintain the screen locks, pins, and passwords.
-
Numerical user ID − This field denotes the ID of the user. The Linux kernel assigns this user ID to the system.
-
Numerical group ID − This field refers to the primary group of the user.
-
Home directory − The new processes are started with a reference of this directory.
-
Command shell − This optional field denotes the default shell that is to be started after a successful login to the system.
Digital forensics include collecting the information which is relevant to tracking an evidence. Hence, the user ids are useful in maintaining the records.
Using Python, all of this information can be automatically analyzed for the Indicators of Analysis, reconstructing the recent system activity. Tracking is simple and easy with the implementation of Linux Shell.
Python Programming with Linux
Example
import sys
import hashlib
import getpass

def main(argv):
   print '\nUser & Password Storage Program in Linux for forensic detection v.01\n'

   if raw_input('The file ' + sys.argv[1] + ' will be erased or overwrite if
         it exists .\nDo you wish to continue (Y/n): ') not in ('Y','y') :
   sys.exit('\nChanges were not recorded\n')

   user_name = raw_input('Please Enter a User Name: ')
   password = hashlib.sha224(getpass.getpass('Please Enter a Password:')).hexdigest()

   # Passwords which are hashed
   try:
      file_conn = open(sys.argv[1],'w')
      file_conn.write(user_name + '\n')
      file_conn.write(password + '\n')
      file_conn.close()
   except:
      sys.exit('There was a problem writing the passwords to file!')

if __name__ == "__main__":
   main(sys.argv[1:])
Python Forensics - Indicators of Compromise
Indicators of Compromise (IOC) is defined as "pieces of forensic data, which includes data found in system log entries or files, that identify potentially malicious activity on a system or network."
By monitoring for IOC, organizations can detect attacks and act quickly to prevent such breaches from occurring or limit damages by stopping attacks in earlier stages.
There are some use-cases, which allow querying the forensic artifacts such as −
-
Looking for a specific file by MD5
-
Searching for a specific entity, which is actually stored in the memory
-
Specific entry or set of entries, which is stored in Windows registry
The combination of all the above provides better results in searching artifacts. As mentioned above, Windows registry gives a perfect platform in generating and maintaining IOC, which directly helps in computational forensics.
Methodology
-
Look for the locations in the file system and specifically for now into Windows registry.
-
Search for the set of artifacts, which have been designed by forensic tools.
-
Look for the signs of any adverse activities.
Investigative Life Cycle
Investigative Life Cycle follows IOC and it searches for specific entries in a registry.
-
Stage 1: Initial Evidence − Evidence of the compromise is detected either on a host or on the network. The responders will investigate and identify the exact solution, which is a concrete forensic indicator.
-
Stage 2: Create IOCs for Host & Network − Following the data collected, the IOC is created, which is easily possible with Windows registry. The flexibility of OpenIOC gives limitless number of permutations on how an Indicator can be crafted.
-
Stage 3: Deploy IOCs in the Enterprise − Once the specified IOC has been created, the investigator will deploy these technologies with the help of API in Windows registers.
-
Stage 4: Identification of Suspects − The deployment of IOC helps in the identification of suspects in a normal way. Even additional systems will be identified.
-
Stage 5: Collect and Analyze Evidence − Evidences against the suspects are gathered and analyzed accordingly.
-
Stage 6: Refine & Create New IOCs − The investigative team can create new IOCs based of their evidences and data found in the enterprise and additional intelligence, and continue to refine their cycle.
The following illustration shows the phases of Investigative Life Cycle −

Python Forensics - Implementation of Cloud
Cloud computing can be defined as a collection of hosted services provided to users over the Internet. It enables organizations to consume or even compute the resource, which includes Virtual Machines (VMs), storage, or an application as a utility.
One of the most important advantages of building applications in Python programming language is that it includes the ability to deploy applications virtually on any platform, which includes cloud as well. It implies that Python can be executed on cloud servers and can also be launched on handy devices such as desktop, tablet, or smartphone.
One of the interesting perspectives is creating a cloud base with the generation of Rainbow tables. It helps in integrating single and multiprocessing versions of the application, which requires some considerations.
Pi Cloud
Pi Cloud is the cloud computing platform, which integrates Python programming language with the computing power of Amazon Web Services.

Let’s take a look at an example of implementing Pi clouds with rainbow tables.
Rainbow Tables
A rainbow table is defined as a listing of all possible plain text permutations of encrypted passwords specific to a given hash algorithm.
-
Rainbow tables follow a standard pattern, which creates a list of hashed passwords.
-
A text file is used to generate passwords, which include characters or plain text of passwords to be encrypted.
-
The file is used by Pi cloud, which calls the main function to be stored.
-
The output of hashed passwords is stored in the text file as well.
This algorithm can be used to save passwords in the database as well and have a backup storage in the cloud system.
The following in-built program creates a list of encrypted passwords in a text file.
Example
import os
import random
import hashlib
import string
import enchant    #Rainbow tables with enchant
import cloud      #importing pi-cloud

def randomword(length):
   return ''.join(random.choice(string.lowercase) for i in range(length))

print('Author- Radhika Subramanian')

def mainroutine():
   engdict = enchant.Dict("en_US")
   fileb = open("password.txt","a+")

   # Capture the values from the text file named password
   while True:
      randomword0 = randomword(6)
      if engdict.check(randomword0) == True:
         randomkey0 = randomword0+str(random.randint(0,99))
      elif engdict.check(randomword0) == False:
         englist = engdict.suggest(randomword0)
         if len(englist) > 0:
            randomkey0 = englist[0]+str(random.randint(0,99))
         else:
            randomkey0 = randomword0+str(random.randint(0,99))

      randomword3 = randomword(5)
      if engdict.check(randomword3) == True:
         randomkey3 = randomword3+str(random.randint(0,99))
      elif engdict.check(randomword3) == False:
         englist = engdict.suggest(randomword3)
         if len(englist) > 0:
            randomkey3 = englist[0]+str(random.randint(0,99))
         else:
            randomkey3 = randomword3+str(random.randint(0,99))

      if 'randomkey0' and 'randomkey3' and 'randomkey1' in locals():
         whasher0 = hashlib.new("md5")
         whasher0.update(randomkey0)
         whasher3 = hashlib.new("md5")
         whasher3.update(randomkey3)
         whasher1 = hashlib.new("md5")
         whasher1.update(randomkey1)
         print(randomkey0+" + "+str(whasher0.hexdigest())+"\n")
         print(randomkey3+" + "+str(whasher3.hexdigest())+"\n")
         print(randomkey1+" + "+str(whasher1.hexdigest())+"\n")
         fileb.write(randomkey0+" + "+str(whasher0.hexdigest())+"\n")
         fileb.write(randomkey3+" + "+str(whasher3.hexdigest())+"\n")
         fileb.write(randomkey1+" + "+str(whasher1.hexdigest())+"\n")

jid = cloud.call(randomword)  #square(3) evaluated on PiCloud
cloud.result(jid)
print('Value added to cloud')
print('Password added')
mainroutine()
