Using OpenID Connect (OIDC) and Keycloak to centralize authorization
了解如何在 Quarkus 应用程序中启用载体令牌授权,以 Keycloak Authorization Services 安全访问受保护的资源。
Learn how to enable bearer token authorization in your Quarkus application using Keycloak Authorization Services for secure access to protected resources.
quarkus-keycloak-authorization 扩展依赖于 quarkus-oidc。它包括一个策略执行器,用于管理对安全资源的访问。访问受 Keycloak 中设置的权限管理。目前,此扩展仅与 Quarkus OIDC service applications 兼容。
The quarkus-keycloak-authorization extension relies on quarkus-oidc.
It includes a policy enforcer that regulates access to secured resources.
Access is governed by permissions set in Keycloak.
Currently, this extension is compatible solely with Quarkus OIDC service applications.
它提供了基于资源访问控制的灵活且动态的授权功能。
It provides a flexible and dynamic authorization capability based on Resource-Based Access Control.
quarkus-keycloak-authorization 不通过基于角色的访问控制 (RBAC) 等特定机制明确执行访问,而是基于资源属性(例如名称、标识符或统一资源标识符 (URI))确定请求权限。此过程涉及将 quarkus-oidc 验证的载体访问令牌发送到 Keycloak 授权服务以进行授权决策。
Rather than explicitly enforcing access through specific mechanisms such as role-based access control (RBAC), quarkus-keycloak-authorization determines request permissions based on resource attributes such as name, identifier, or Uniform Resource Identifier (URI).
This process involves sending a quarkus-oidc-verified bearer access token to Keycloak Authorization Services for an authorization decision.
仅在使用 Keycloak 且启用 Keycloak 授权服务以做出授权决策时使用 quarkus-keycloak-authorization。如果您不使用 Keycloak 或使用 Keycloak 但未启用其 Keycloak 授权服务以做出授权决策,请使用 quarkus-oidc。
Use quarkus-keycloak-authorization only if you work with Keycloak and have Keycloak Authorization Services enabled to make authorization decisions.
Use quarkus-oidc if you do not work with Keycloak or work with Keycloak but do not have its Keycloak Authorization Services enabled to make authorization decisions.
通过将授权责任转移到应用程序外部,您可以通过各种访问控制方法来增强安全性,同时无需在安全需求不断演化时频繁地重新部署。在这种情况下,Keycloak 充当集中式授权中心,有效管理您的受保护资源及其相应权限。
By shifting authorization responsibilities outside your application, you enhance security through various access control methods while eliminating the need for frequent re-deployments whenever security needs evolve. In this case, Keycloak acts as a centralized authorization hub, managing your protected resources and their corresponding permissions effectively.
有关更多信息,请参阅 OIDC Bearer token authentication 指南。重要的是要认识到,载体令牌身份验证机制进行身份验证并创建安全身份。同时, quarkus-keycloak-authorization 扩展根据当前请求路径和其他策略设置将 Keycloak 授权策略应用于此身份。
For more information, see the OIDC Bearer token authentication guide.
It is important to realize that the Bearer token authentication mechanism does the authentication and creates a security identity.
Meanwhile, the quarkus-keycloak-authorization extension applies a Keycloak Authorization Policy to this identity based on the current request path and other policy settings.
有关更多信息,请参阅 Keycloak Authorization Services documentation。
For more information, see Keycloak Authorization Services documentation.
Architecture
在此示例中,我们将构建一个非常简单的微服务,提供两个端点:
In this example, we build a very simple microservice that offers two endpoints:
-
/api/users/me -
/api/admin
这些端点受保护。仅当客户端在请求中发送一个携带令牌时才被允许访问。此令牌必须有效,具有正确的签名、到期时间和受众。此外,微服务必须信任令牌。
These endpoints are protected. Access is granted only when a client sends a bearer token with the request. This token must be valid, having a correct signature, expiration date, and audience. Additionally, the microservice must trust the token.
载体令牌由 Keycloak 服务器颁发,并代表颁发令牌的主体。作为 OAuth 2.0 授权服务器,此令牌还引用代表用户的客户端。
The bearer token is issued by a Keycloak server and represents the subject for which the token was issued. For being an OAuth 2.0 Authorization Server, the token also references the client acting on behalf of the user.
任何具有有效令牌的用户都可以访问 /api/users/me 端点。作为响应,它返回一个包含从载入令牌信息中获取的用户详细信息的 JSON 文档。此端点受到 RBAC 保护,并且只有被授予 user 角色的用户才能访问此端点。
The /api/users/me endpoint can be accessed by any user with a valid token.
As a response, it returns a JSON document with details about the user obtained from the information carried on the token.
This endpoint is protected with RBAC, and only users granted with the user role can access this endpoint.
/api/admin 端点受 RBAC 保护,并且只有被授予 admin 角色的用户才能访问它。
The /api/admin endpoint is protected with RBAC, and only users granted the admin role can access it.
这是一个非常简单的示例,展示了如何使用 RBAC 策略来管理资源访问。但是,Keycloak 支持其他策略,您可以使用这些策略来执行更细粒度的访问控制。通过使用此示例,您会看到您的应用程序与您的授权策略完全分离,其执行完全基于访问的资源。
This is a very simple example of using RBAC policies to govern access to your resources. However, Keycloak supports other policies that you can use to perform even more fine-grained access control. By using this example, you’ll see that your application is completely decoupled from your authorization policies, with enforcement purely based on the accessed resource.
Solution
我们建议您遵循接下来的部分中的说明,按部就班地创建应用程序。然而,您可以直接跳到完成的示例。
We recommend that you follow the instructions in the next sections and create the application step by step. However, you can go right to the completed example.
克隆 Git 存储库: git clone {quickstarts-clone-url},或下载 {quickstarts-archive-url}[存档]。
Clone the Git repository: git clone {quickstarts-clone-url}, or download an {quickstarts-archive-url}[archive].
解决方案在 security-keycloak-authorization-quickstart directory 中。
The solution is in the security-keycloak-authorization-quickstart directory.
Creating the project
首先,我们需要一个新项目。使用以下命令创建一个新项目:
First, we need a new project. Create a new project with the following command:
Unresolved directive in security-keycloak-authorization.adoc - include::{includes}/devtools/create-app.adoc[]
此命令会生成一个项目,并导入 keycloak-authorization 扩展。此扩展为 Quarkus 应用程序实现了一个 Keycloak 适配器,并提供了与 Keycloak 服务器集成和执行持有者令牌授权所需的所有功能。
This command generates a project, importing the keycloak-authorization extension.
This extension implements a Keycloak Adapter for Quarkus applications and provides all the necessary capabilities to integrate with a Keycloak server and perform bearer token authorization.
如果您已经配置了 Quarkus 项目,则可以通过在项目基础目录中运行以下命令来将 oidc 和 keycloak-authorization 扩展添加到您的项目:
If you already have your Quarkus project configured, you can add the oidc and keycloak-authorization extensions
to your project by running the following command in your project base directory:
Unresolved directive in security-keycloak-authorization.adoc - include::{includes}/devtools/extension-add.adoc[]
这会将以下依赖添加到您的构建文件中:
This adds the following dependencies to your build file:
<dependency>
    <groupId>io.quarkus</groupId>
    <artifactId>quarkus-oidc</artifactId>
</dependency>
<dependency>
    <groupId>io.quarkus</groupId>
    <artifactId>quarkus-keycloak-authorization</artifactId>
</dependency>implementation("io.quarkus:quarkus-oidc")
implementation("io.quarkus:quarkus-keycloak-authorization")让我们从实现 /api/users/me 端点开始。如您在以下源代码中看到的那样,它是一个常规的 Jakarta REST 资源:
Let’s start by implementing the /api/users/me endpoint.
As you can see in the following source code, it is a regular Jakarta REST resource:
package org.acme.security.keycloak.authorization;

import jakarta.inject.Inject;
import jakarta.ws.rs.GET;
import jakarta.ws.rs.Path;

import org.jboss.resteasy.reactive.NoCache;

import io.quarkus.security.identity.SecurityIdentity;

@Path("/api/users")
public class UsersResource {

    @Inject
    SecurityIdentity identity;

    @GET
    @Path("/me")
    @NoCache
    public User me() {
        return new User(identity);
    }

    public static class User {

        private final String userName;

        User(SecurityIdentity identity) {
            this.userName = identity.getPrincipal().getName();
        }

        public String getUserName() {
            return userName;
        }
    }
}
/api/admin 端点的源代码也很简单:
The source code for the /api/admin endpoint is also very simple:
package org.acme.security.keycloak.authorization;

import jakarta.ws.rs.GET;
import jakarta.ws.rs.Path;
import jakarta.ws.rs.Produces;
import jakarta.ws.rs.core.MediaType;

import io.quarkus.security.Authenticated;

@Path("/api/admin")
@Authenticated
public class AdminResource {

    @GET
    @Produces(MediaType.TEXT_PLAIN)
    public String admin() {
        return "granted";
    }
}
请注意,我们没有定义诸如 @RolesAllowed 之类的注解来明确执行对资源的访问。相反,该扩展负责映射 Keycloak 中受保护资源的 URI,并相应地评估权限,根据 Keycloak 授予的权限授予或拒绝访问。
Be aware that we have not defined annotations such as @RolesAllowed to explicitly enforce access to a resource.
Instead, the extension is responsible for mapping the URIs of the protected resources in Keycloak and evaluating the permissions accordingly, granting or denying access depending on the permissions granted by Keycloak.
Configuring the application
OpenID Connect 扩展允许您使用 application.properties 文件定义适配器配置,该文件通常位于 src/main/resources 目录中。
The OpenID Connect extension allows you to define the adapter configuration by using the application.properties file, which is usually located in the src/main/resources directory.
# OIDC Configuration
%prod.quarkus.oidc.auth-server-url=https://localhost:8543/realms/quarkus
quarkus.oidc.client-id=backend-service
quarkus.oidc.credentials.secret=secret
quarkus.oidc.tls.verification=none

# Enable Policy Enforcement
quarkus.keycloak.policy-enforcer.enable=true

# Tell Dev Services for Keycloak to import the realm file
# This property is not effective when running the application in JVM or native modes
quarkus.keycloak.devservices.realm-path=quarkus-realm.json|
为 |
|
Adding a |
|
默认情况下,使用 |
|
By default, applications that use the |
Starting and configuring the Keycloak server
|
当您在开发模式下运行应用程序时,不要启动 Keycloak 服务器。Keycloak 开发服务会启动一个容器。有关更多信息,请参见 Running the application in Dev mode 部分。 |
|
Do not start the Keycloak server when you run the application in dev mode. Dev Services for Keycloak launches a container. For more information, see the keycloak-dev-mode section. |
要启动 Keycloak 服务器,请使用以下 Docker 命令:
To start a Keycloak server, use the following Docker command:
docker run --name keycloak -e KEYCLOAK_ADMIN=admin -e KEYCLOAK_ADMIN_PASSWORD=admin -p 8543:8443 -v "$(pwd)"/config/keycloak-keystore.jks:/etc/keycloak-keystore.jks quay.io/keycloak/keycloak:{keycloak.version} start --hostname-strict=false --https-key-store-file=/etc/keycloak-keystore.jks其中 keycloak.version 必须是 25.0.2 或更高版本,而 keycloak-keystore.jks 可在 quarkus-quickstarts/security-keycloak-authorization-quickstart/config 中找到。
where keycloak.version must be 25.0.2 or later and the keycloak-keystore.jks can be found in quarkus-quickstarts/security-keycloak-authorization-quickstart/config.
尝试通过 localhost:8543 访问您的 Keycloak 服务器。
Try to access your Keycloak server at localhost:8543.
要访问 Keycloak 管理控制台,请使用 admin 用户登录。用户名和密码均为 admin。
To access the Keycloak Administration Console, log in as the admin user.
The username and password are both admin.
导入 realm configuration file 以创建新领域。有关更多详细信息,请参阅 Keycloak 文档,了解如何 create a new realm。
Import the realm configuration file to create a new realm. For more details, see the Keycloak documentation about how to create a new realm.
导入领域后,您可以看到资源权限:
After importing the realm you can see the resource permissions:
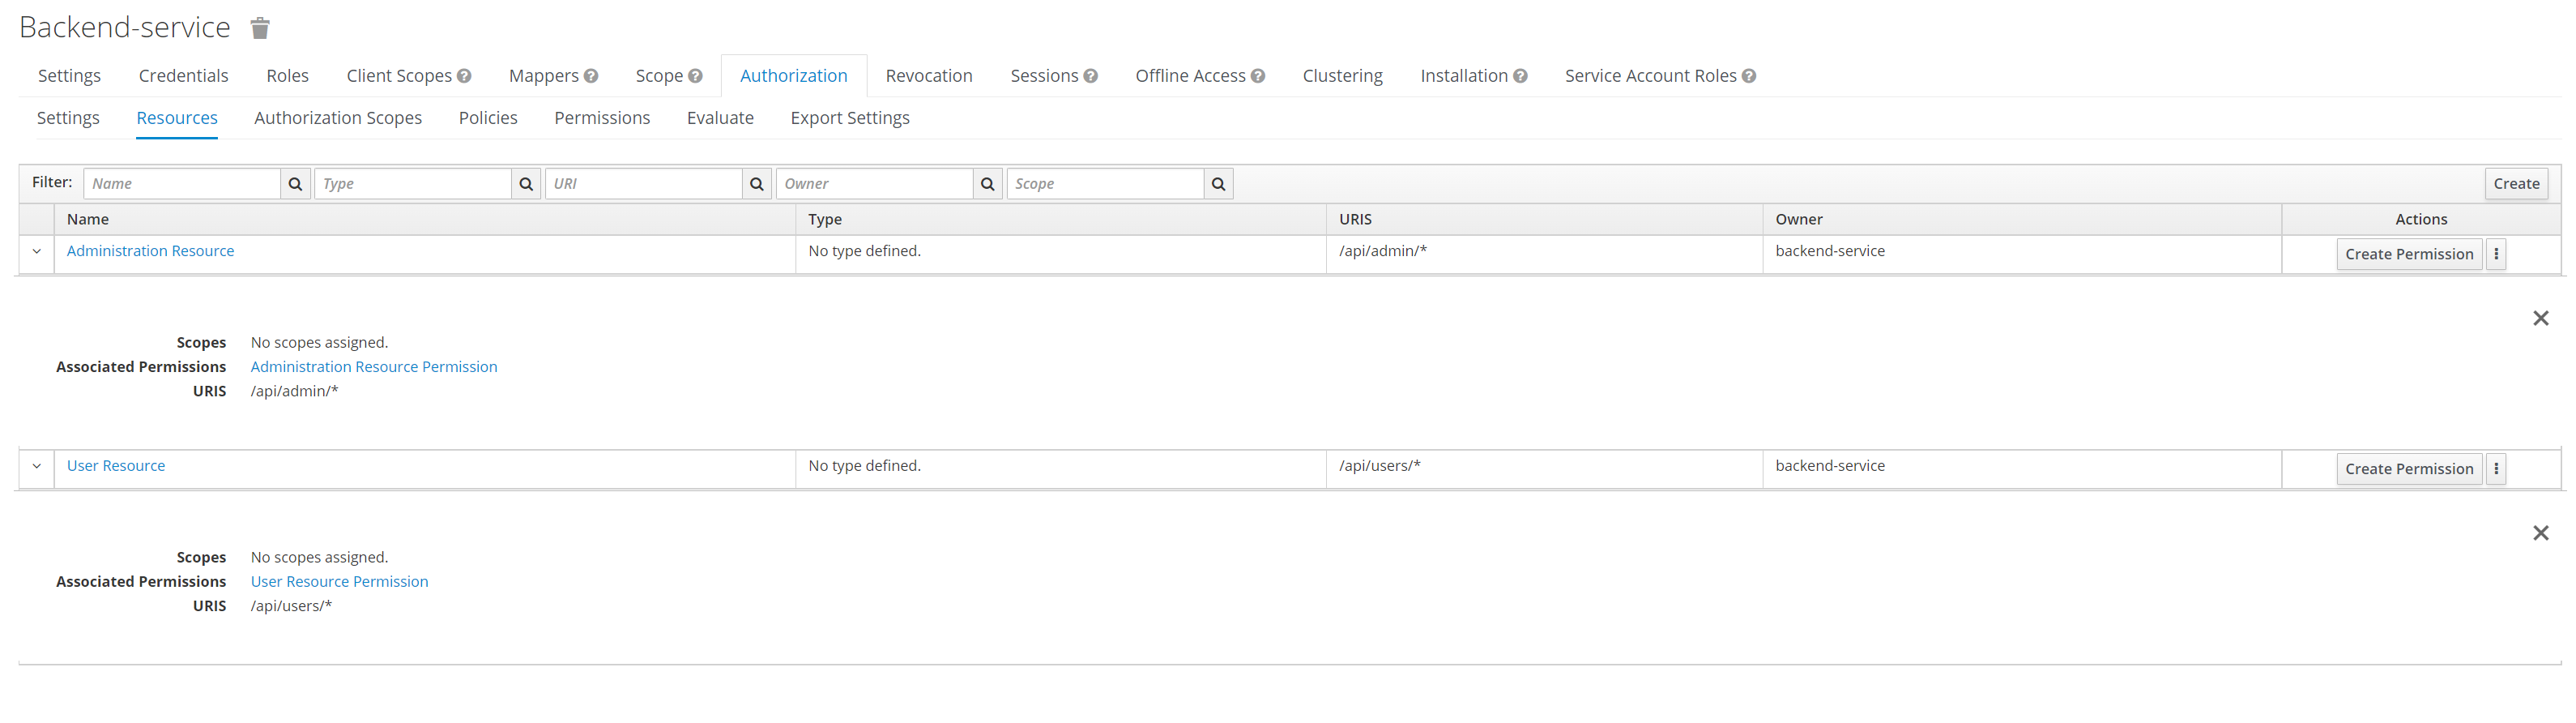
它解释了为什么端点没有 @RolesAllowed 注释 - 资源访问权限直接设置在 Keycloak 中。
It explains why the endpoint has no @RolesAllowed annotations - the resource access permissions are set directly in Keycloak.
Running the application in dev mode
要以 dev 模式运行应用程序,请使用:
To run the application in dev mode, use:
Unresolved directive in security-keycloak-authorization.adoc - include::{includes}/devtools/dev.adoc[]
Dev Services for Keycloak 启动 Keycloak 容器并导入 quarkus-realm.json.
Dev Services for Keycloak launches a Keycloak container and imports a quarkus-realm.json.
Open a Dev UI available at /q/dev-ui and click a Provider: Keycloak link in an OpenID Connect Dev UI card.
当被要求登录到由 OpenID Connect Dev UI 提供的 Single Page Application 时:
When asked to log in to a Single Page Application provided by OpenID Connect Dev UI:
-
Log in as
alice(password:alice), who only has aUser Permissionto access the/api/users/meresource:-
Access
/api/admin, which returns403. -
Access
/api/users/me, which returns200.
-
-
Log out and log in as
admin(password:admin), who has bothAdmin Permissionto access the/api/adminresource andUser Permissionto access the/api/users/meresource:-
Access
/api/admin, which returns200. -
Access
/api/users/me, which returns200.
-
如果您在不导入诸如 quarkus-realm.json 的已配置为支持 Keycloak Authorization 的领域文件的情况下启动 Dev Services for Keycloak,请创建一个没有 Keycloak 授权策略的默认 quarkus 领域。在这种情况下,您必须在 OpenId Connect Dev UI 卡中选择 Keycloak Admin 链接并在默认 quarkus 领域中配置 Keycloak Authorization Services。
If you have started Dev Services for Keycloak without importing a realm file such as quarkus-realm.json that is already configured to support Keycloak Authorization, create a default quarkus realm without Keycloak authorization policies.
In this case, you must select the Keycloak Admin link in the OpenId Connect Dev UI card and configure Keycloak Authorization Services in the default quarkus realm.
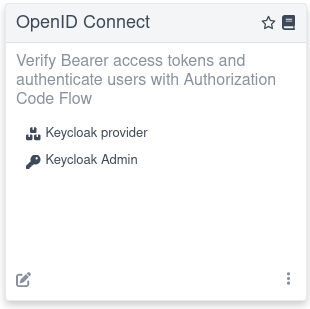
在 Dev UI 中,很容易找到 Keycloak Admin 链接:
The Keycloak Admin link is easy to find in Dev UI:
登录到 Keycloak 管理控制台时,用户名和密码均为 admin。
When logging into the Keycloak admin console, the username and password are both admin.
如果您的应用程序使用已配置为 JavaScript policies 的 Keycloak 授权,并部署在 JAR 文件中,则可以设置 Keycloak 的开发服务,将此档案传输到 Keycloak 容器。例如:
If your application uses Keycloak authorization configured with JavaScript policies that are deployed in a JAR file, you can set up Dev Services for Keycloak to transfer this archive to the Keycloak container. For instance:
quarkus.keycloak.devservices.resource-aliases.policies=/policies.jar 1
quarkus.keycloak.devservices.resource-mappings.policies=/opt/keycloak/providers/policies.jar 2| 1 | policies alias is created for the /policies.jar classpath resource.
Policy archive can also be located in the file system. |
| 2 | The policies archive is mapped to the /opt/keycloak/providers/policies.jar container location. |
Running the application in JVM mode
在 dev 模式下探索应用程序后,您可以将其作为标准 Java 应用程序运行。
After exploring the application in dev mode, you can run it as a standard Java application.
首先编译它:
First compile it:
Unresolved directive in security-keycloak-authorization.adoc - include::{includes}/devtools/build.adoc[]
然后运行它:
Then run it:
java -jar target/quarkus-app/quarkus-run.jarRunning the application in native mode
可以将相同的演示编译成本机代码,无需改动。
This same demo can be compiled into native code; no modifications are required.
这意味着您不再需要在您的生产环境中安装 JVM,因为运行时技术包含在生产的二进制文件中并在最低限度资源下运行。
This implies that you no longer need to install a JVM on your production environment because the runtime technology is included in the produced binary and optimized to run with minimal resources.
编译需要较长时间,所以默认情况下此步骤被关闭;让我们通过启用`native`配置文件再次构建:
Compilation takes a bit longer, so this step is turned off by default; let’s build again by enabling the native profile:
Unresolved directive in security-keycloak-authorization.adoc - include::{includes}/devtools/build-native.adoc[]
一段时间后,您可以直接运行此二进制文件:
After a while, you can run this binary directly:
./target/security-keycloak-authorization-quickstart-runnerTesting the application
请参阅上文Running the application in Dev mode关于在 dev 模式中测试您的应用程序的部分。
See the preceding keycloak-dev-mode section about testing your application in a dev mode.
您可以使用`curl`测试在 JVM 或本地模式中启动的应用程序。
You can test the application launched in JVM or native modes with curl.
该应用程序使用 bearer 标记授权,首先要从 Keycloak 服务器获取一个访问标记以访问应用程序资源:
The application uses bearer token authorization, and the first thing to do is obtain an access token from the Keycloak server to access the application resources:
export access_token=$(\
    curl --insecure -X POST https://localhost:8543/realms/quarkus/protocol/openid-connect/token \
    --user backend-service:secret \
    -H 'content-type: application/x-www-form-urlencoded' \
    -d 'username=alice&password=alice&grant_type=password' | jq --raw-output '.access_token' \
 )
上文示例为用户`alice`获取一个访问标记。
The preceding example obtains an access token for user alice.
任何用户都可以访问`http://localhost:8080/api/users/me`端点,它会返回一个 JSON 有效负载,包含有关该用户的详细信息。
Any user is allowed to access the
http://localhost:8080/api/users/me endpoint,
which returns a JSON payload with details about the user.
curl -v -X GET \
  http://localhost:8080/api/users/me \
  -H "Authorization: Bearer "$access_token
只有具备`admin`角色的用户才能访问`http://localhost:8080/api/admin`端点。如果您尝试使用先前发出的访问令牌访问此端点,您会从服务器处得到一个`403`响应。
The http://localhost:8080/api/admin endpoint can only be accessed by users with the admin role.
If you try to access this endpoint with the previously issued access token, you get a 403 response from the server.
 curl -v -X GET \
   http://localhost:8080/api/admin \
   -H "Authorization: Bearer "$access_token
要访问 admin 端点,请获取一个`admin`用户的令牌:
To access the admin endpoint, get a token for the admin user:
export access_token=$(\
    curl --insecure -X POST https://localhost:8543/realms/quarkus/protocol/openid-connect/token \
    --user backend-service:secret \
    -H 'content-type: application/x-www-form-urlencoded' \
    -d 'username=admin&password=admin&grant_type=password' | jq --raw-output '.access_token' \
 )
Injecting the authorization client
在某些情况下,使用 Keycloak Authorization Client Java API对于管理资源和直接从 Keycloak 获取权限等任务很有益。为此,您可以将`AuthzClient`实例注入到您的 bean 中,如下所示:
In some cases, using the Keycloak Authorization Client Java API is beneficial for tasks such as managing resources and obtaining permissions directly from Keycloak.
For this purpose, you can inject an AuthzClient instance into your beans as follows:
public class ProtectedResource {
    @Inject
    AuthzClient authzClient;
}|
如果您想要直接使用`AuthzClient`,请设置`quarkus.keycloak.policy-enforcer.enable=true`;否则,没有可用于注入的 bean。 |
|
If you want to use the |
Mapping protected resources
默认情况下,该扩展程序按需从 Keycloak 获取资源,使用它们的 URI 来识别和映射需要保护的您应用程序中的资源。
By default, the extension fetches resources on-demand from Keycloak, using their URI to identify and map the resources in your application that need to be protected.
要禁用按需获取并预先加载资源,请应用如下配置设置:
To disable this on-demand fetching and instead pre-load resources at startup, apply the following configuration setting:
quarkus.keycloak.policy-enforcer.lazy-load-paths=false在启动时从 Keycloak 预先加载资源所需的时间会根据资源的数量而异,可能会影响您应用程序的初始加载时间。
The time required to pre-load resources from Keycloak at startup varies based on their quantity, potentially affecting your application’s initial load time."
More about configuring protected resources
在默认配置中,Keycloak 管理角色并决定哪些人可以访问哪些路由。
In the default configuration, Keycloak manages the roles and decides who can access which routes.
要使用`@RolesAllowed`注解或`application.properties`文件来配置受保护路由,请检查OpenID Connect (OIDC) Bearer token authentication和Authorization of web endpoints指南。要了解更多详细信息,请查看Quarkus Security overview。
To configure the protected routes by using the @RolesAllowed annotation or the application.properties file, check the OpenID Connect (OIDC) Bearer token authentication and Authorization of web endpoints guides.
For more details, check the Quarkus Security overview.
Access to public resources
要在不受`quarkus-keycloak-authorization`应用其政策的情况下启用对公共资源的访问,请在`application.properties`中创建一个`permit`HTTP 策略配置。要了解更多信息,请参阅Authorization of web endpoints指南。
To enable access to a public resource without the quarkus-keycloak-authorization applying its policies, create a permit HTTP Policy configuration in application.properties.
For more information, see the Authorization of web endpoints guide.
不需要使用此类设置注销 Keycloak 授权策略的政策检查:
There’s no need to deactivate policy checks for a Keycloak Authorization Policy with settings such as these:
quarkus.keycloak.policy-enforcer.paths.1.paths=/api/public
quarkus.keycloak.policy-enforcer.paths.1.enforcement-mode=DISABLED
若要阻止匿名用户访问公用资源,您可以创建强制实施的 Keycloak 授权策略:
To block access to the public resource to anonymous users, you can create an enforcing Keycloak Authorization Policy:
quarkus.keycloak.policy-enforcer.paths.1.paths=/api/public-enforcing
quarkus.keycloak.policy-enforcer.paths.1.enforcement-mode=ENFORCING
如果您需要控制匿名用户访问公用资源,则仅适用于默认租户配置。
Only the default tenant configuration applies when controlling anonymous access to the public resource is required.
Checking permission scopes programmatically
除了资源权限外,您可以指定方法作用域。作用域通常表示可以对资源执行的操作。您可以创建一个具有方法作用域的实施强制 Keycloak 授权策略。例如:
In addition to resource permissions, you can specify method scopes. The scope usually represents an action that can be performed on a resource. You can create an enforcing Keycloak Authorization Policy with a method scope. For example:
# path policy with enforced scope 'read' for method 'GET'
quarkus.keycloak.policy-enforcer.paths.1.name=Scope Permission Resource
quarkus.keycloak.policy-enforcer.paths.1.paths=/api/protected/standard-way
quarkus.keycloak.policy-enforcer.paths.1.methods.get.method=GET
quarkus.keycloak.policy-enforcer.paths.1.methods.get.scopes=read 1

# path policies without scope
quarkus.keycloak.policy-enforcer.paths.2.name=Scope Permission Resource
quarkus.keycloak.policy-enforcer.paths.2.paths=/api/protected/programmatic-way,/api/protected/annotation-way| 1 | User must have resource permission 'Scope Permission Resource' and scope 'read' |
Keycloak 策略强制程序现在保护 /api/protected/standard-way 请求路径,无需其他注释,例如 @RolesAllowed。然而,在某些情况下,需要程序检查。您可以通过将 SecurityIdentity 实例注入到 bean 中来实现此目的,如以下示例所示。或者,您可以通过使用 @PermissionsAllowed 注释资源方法来获得相同的结果。以下示例演示了三个资源方法,每个方法都要求相同的 read 作用域:
The Keycloak Policy Enforcer now secures the /api/protected/standard-way request path, eliminating the need for additional annotations such as @RolesAllowed.
However, in certain scenarios, a programmatic check is necessary.
You can achieve this by injecting a SecurityIdentity instance into your beans, as shown in the following example.
Or, you can get the same result by annotating the resource method with @PermissionsAllowed.
The following example demonstrates three resource methods, each requiring the same read scope:
import java.security.BasicPermission;
import java.util.List;

import jakarta.inject.Inject;
import jakarta.ws.rs.ForbiddenException;
import jakarta.ws.rs.GET;
import jakarta.ws.rs.Path;

import org.keycloak.representations.idm.authorization.Permission;

import io.quarkus.security.PermissionsAllowed;
import io.quarkus.security.identity.SecurityIdentity;
import io.smallrye.mutiny.Uni;

@Path("/api/protected")
public class ProtectedResource {

    @Inject
    SecurityIdentity identity;

    @GET
    @Path("/standard-way")
    public Uni<List<Permission>> standardWay() { 1
        return Uni.createFrom().item(identity.<List<Permission>> getAttribute("permissions"));
    }

    @GET
    @Path("/programmatic-way")
    public Uni<List<Permission>> programmaticWay() {
        var requiredPermission = new BasicPermission("Scope Permission Resource") {
            @Override
            public String getActions() {
                return "read";
            }
        };
        return identity.checkPermission(requiredPermission).onItem() 2
                .transform(granted -> {
                    if (granted) {
                        return identity.getAttribute("permissions");
                    }
                    throw new ForbiddenException();
                });
    }

    @PermissionsAllowed("Scope Permission Resource:read") 3
    @GET
    @Path("/annotation-way")
    public Uni<List<Permission>> annotationWay() {
        return Uni.createFrom().item(identity.<List<Permission>> getAttribute("permissions"));
    }
}| 1 | Request sub-path /standard-way requires both resource permission and scope read according to the configuration properties we previously set in the application.properties. |
| 2 | Request sub-path /programmatic-way only requires permission Scope Permission Resource, but we can enforce scope with SecurityIdentity#checkPermission. |
| 3 | The @PermissionsAllowed annotation only grants access to the requests with permission Scope Permission Resource and scope read.
For more information, see the section Authorization using annotations of the Security Authorization guide. |
Multi-tenancy
您可以为每个租户设置策略强制程序配置,这与通过 OpenID Connect (OIDC) multi-tenancy 完成的方式类似。
You can set up policy enforcer configurations for each tenant, similar to how it is done with OpenID Connect (OIDC) multi-tenancy.
例如:
For example:
quarkus.keycloak.policy-enforcer.enable=true

# Default Tenant
quarkus.oidc.auth-server-url=${keycloak.url:replaced-by-test-resource}/realms/quarkus
quarkus.oidc.client-id=quarkus-app
quarkus.oidc.credentials.secret=secret

quarkus.keycloak.policy-enforcer.enforcement-mode=PERMISSIVE
quarkus.keycloak.policy-enforcer.paths.1.name=Permission Resource
quarkus.keycloak.policy-enforcer.paths.1.paths=/api/permission
quarkus.keycloak.policy-enforcer.paths.1.claim-information-point.claims.static-claim=static-claim

# Service Tenant

quarkus.oidc.service-tenant.auth-server-url=${keycloak.url:replaced-by-test-resource}/realms/quarkus
quarkus.oidc.service-tenant.client-id=quarkus-app
quarkus.oidc.service-tenant.credentials.secret=secret

quarkus.keycloak.service-tenant.policy-enforcer.enforcement-mode=PERMISSIVE
quarkus.keycloak.service-tenant.policy-enforcer.paths.1.name=Permission Resource Service
quarkus.keycloak.service-tenant.policy-enforcer.paths.1.paths=/api/permission
quarkus.keycloak.service-tenant.policy-enforcer.paths.1.claim-information-point.claims.static-claim=static-claim


# WebApp Tenant

quarkus.oidc.webapp-tenant.auth-server-url=${keycloak.url:replaced-by-test-resource}/realms/quarkus
quarkus.oidc.webapp-tenant.client-id=quarkus-app
quarkus.oidc.webapp-tenant.credentials.secret=secret
quarkus.oidc.webapp-tenant.application-type=web-app
quarkus.oidc.webapp-tenant.roles.source=accesstoken

quarkus.keycloak.webapp-tenant.policy-enforcer.enforcement-mode=PERMISSIVE
quarkus.keycloak.webapp-tenant.policy-enforcer.paths.1.name=Permission Resource WebApp
quarkus.keycloak.webapp-tenant.policy-enforcer.paths.1.paths=/api/permission
quarkus.keycloak.webapp-tenant.policy-enforcer.paths.1.claim-information-point.claims.static-claim=static-claim
Dynamic tenant configuration resolution
如果您需要对您想要支持的不同租户采用更动态的配置,并且不希望最终在您的配置文件中有多个条目,则可以使用 io.quarkus.keycloak.pep.TenantPolicyConfigResolver。
If you need a more dynamic configuration for the different tenants you want to support and don’t want to end up
with multiple entries in your configuration file, you can use the io.quarkus.keycloak.pep.TenantPolicyConfigResolver.
此界面允许您在运行时动态创建租户配置:
This interface allows you to dynamically create tenant configurations at runtime:
package org.acme.security.keycloak.authorization;

import java.util.Map;

import jakarta.enterprise.context.ApplicationScoped;

import io.quarkus.keycloak.pep.TenantPolicyConfigResolver;
import io.quarkus.keycloak.pep.runtime.KeycloakPolicyEnforcerConfig;
import io.quarkus.keycloak.pep.runtime.KeycloakPolicyEnforcerTenantConfig;
import io.quarkus.oidc.OidcRequestContext;
import io.quarkus.oidc.OidcTenantConfig;
import io.smallrye.mutiny.Uni;
import io.vertx.ext.web.RoutingContext;

@ApplicationScoped
public class CustomTenantPolicyConfigResolver implements TenantPolicyConfigResolver {

    private final KeycloakPolicyEnforcerTenantConfig enhancedTenantConfig;
    private final KeycloakPolicyEnforcerTenantConfig newTenantConfig;

    public CustomTenantPolicyConfigResolver(KeycloakPolicyEnforcerConfig enforcerConfig) {
        this.enhancedTenantConfig = KeycloakPolicyEnforcerTenantConfig.builder(config) 1
            .paths("/enhanced-config")
            .permissionName("Permission Name")
            .get("read-scope")
            .build();
        this.newTenantConfig = KeycloakPolicyEnforcerTenantConfig.builder() 2
            .paths("/new-config")
            .claimInformationPoint(Map.of("claims", Map.of("grant", "{request.parameter['grant']}")))
            .build();
    }

    @Override
    public Uni<KeycloakPolicyEnforcerTenantConfig> resolve(RoutingContext routingContext, OidcTenantConfig tenantConfig,
                                                OidcRequestContext<KeycloakPolicyEnforcerTenantConfig> requestContext) {
        String path = routingContext.normalizedPath();
        String tenantId = tenantConfig.tenantId.orElse(null);
        if ("enhanced-config-tenant".equals(tenantId) && path.equals("/enhanced-config")) {
            return Uni.createFrom().item(enhancedTenantConfig);
        } else if ("new-config-tenant".equals(tenantId) && path.equals("/new-config")) {
            return Uni.createFrom().item(newTenantConfig);
        }
        return Uni.createFrom().nullItem(); 3
    }
}| 1 | Create or update the /enhanced-config path in the default tenant config. |
| 2 | Add /new-config path into tenant config populated with documented configuration default values. |
| 3 | Use default static tenant configuration resolution based on the application.properties file and other SmallRye Config configuration sources. |
Configuration reference
此配置遵循官方 [Keycloak 策略强制程序配置]([role="bare"][role="bare"]https://www.keycloak.org/docs/latest/authorization_services/index.html#_enforcer_filter) 指南。有关各种配置选项的详细信息,请参阅以下文档:
This configuration adheres to the official [Keycloak Policy Enforcer Configuration]([role="bare"]https://www.keycloak.org/docs/latest/authorization_services/index.html#_enforcer_filter) guidelines. For detailed insights into various configuration options, see the following documentation:
Unresolved directive in security-keycloak-authorization.adoc - include::{generated-dir}/config/quarkus-keycloak-authorization.adoc[]