Javafx 简明教程
JavaFX - Images
图像是最常在任何应用程序(包括 JavaFX 应用程序)中使用的元素之一。图像可以以各种形式出现,例如照片、图形或个人视频帧等。JavaFX 也支持多种数字格式的图像,它们是:
Images are one of the most common elements that are used on any application, including JavaFX applications. An image can be in various forms like photographs, graphics or individual video frames etc. There are various digital formats of images which are also supported by JavaFX, they are:
-
BMP
-
GIF
-
JPEG
-
PNG
你可以使用 JavaFX 在 javafx.scene.image 包中提供的类,加载并修改上述所有格式的图像。
You can load and modify images of all the formats mentioned above using the classes provided by JavaFX in the package javafx.scene.image.
本章将说明如何在 JavaFX 中加载图像、如何在多个视图中投影图像以及如何修改图像的像素。
This chapter teaches you how to load images in to JavaFX, how to project an image in multiple views and how to alter the pixels of an image.
Loading an Image
你可以通过实例化 javafx.scene.image 包中的名为 Image 的类,在 JavaFX 中加载图像。
You can load an image in JavaFX by instantiating the class named Image of the package javafx.scene.image.
对于 Image 类的构造函数,你必须将以下内容之一作为图像源传递 -
To the constructor of the Image class, you have to pass either of the following as the image source −
-
An InputStream object of the image to be loaded or,
-
A string variable holding the URL for the image.
为了减少图像的内存存储量,还可以在加载图像时调整图像的大小。可以通过将以下可选参数传递给 Image 类的构造函数来实现此目的。
An image can also be resized while they are being loaded, in order to reduce its memory storage amount. This can be done by passing following optional parameters to the constructor of Image class.
-
requestedWidth to set the target width of the displayed image.
-
requestedHeight to set the target height of the displayed image.
-
preserveRatio is a boolean value that specifies whether the aspect ratio of the final image must remain the same as the original image or not.
-
smooth represents the quality of filtering applied on the image.
-
backgroundLoading represents whether the image needs to be loaded in the background or not.
图像加载后,你可以通过实例化 ImageView 类来查看它。同一图像实例可供多个 ImageView 类使用以显示它。
Once the image is loaded, you can view it by instantiating the ImageView class. Same image instance can be used by multiple ImageView classes to display it.
Syntax
以下是加载和查看图像的语法 −
Following is the syntax to load and view an Image −
//Passing FileInputStream object as a parameter
FileInputStream inputstream = new FileInputStream("C:\\images\\image.jpg");
Image image = new Image(inputstream);

//Loading image from URL
//Image image = new Image(new FileInputStream("url for the image));
加载图像之后,您可以通过实例化 ImageView 类并将图像传递给其构造函数来设置图像视图,如下所示 −
After loading the image, you can set the view for the image by instantiating the ImageView class and passing the image to its constructor as follows −
ImageView imageView = new ImageView(image);Example
以下示例演示了如何在 JavaFX 中加载图像并设置视图。
Following is an example which demonstrates how to load an image in JavaFX and set the view.
将此代码另存为名为 ImageExample.java 的文件。
Save this code in a file with the name ImageExample.java.
import java.io.FileInputStream;
import java.io.FileNotFoundException;
import javafx.application.Application;
import javafx.scene.Group;
import javafx.scene.Scene;
import javafx.scene.image.Image;
import javafx.scene.image.ImageView;
import javafx.stage.Stage;

public class ImageExample extends Application {
   @Override
   public void start(Stage stage) throws FileNotFoundException {
      //Creating an image
      Image image = new Image(new FileInputStream("path of the image"));

      //Setting the image view
      ImageView imageView = new ImageView(image);

      //Setting the position of the image
      imageView.setX(50);
      imageView.setY(25);

      //setting the fit height and width of the image view
      imageView.setFitHeight(455);
      imageView.setFitWidth(500);

      //Setting the preserve ratio of the image view
      imageView.setPreserveRatio(true);

      //Creating a Group object
      Group root = new Group(imageView);

      //Creating a scene object
      Scene scene = new Scene(root, 600, 500);

      //Setting title to the Stage
      stage.setTitle("Loading an image");

      //Adding scene to the stage
      stage.setScene(scene);

      //Displaying the contents of the stage
      stage.show();
   }
   public static void main(String args[]) {
      launch(args);
   }
}
使用以下命令,从命令提示符编译并执行已保存的 java 文件。
Compile and execute the saved java file from the command prompt using the following commands.
javac --module-path %PATH_TO_FX% --add-modules javafx.controls ImageExample.java
java --module-path %PATH_TO_FX% --add-modules javafx.controls ImageExample
执行后,以上程序将生成一个 JavaFX 窗口,如下所示 −
On executing, the above program generates a JavaFX window as follows −

Example
在此示例中,让我们尝试通过将最终尺寸和过滤质量传递给 Image 类的构造函数来调整图像的大小(比如前面的输出图像)。将代码另存为名为 ResizedImageExample.java 的文件。
In this example, let us try to resize an image (say the previous output image) by passing the final dimensions and the quality of filtering to the constructor of Image class. Save the code in a file named ResizedImageExample.java.
import java.io.FileInputStream;
import java.io.FileNotFoundException;
import javafx.application.Application;
import javafx.scene.Group;
import javafx.scene.Scene;
import javafx.scene.image.Image;
import javafx.scene.image.ImageView;
import javafx.stage.Stage;

public class ResizedImageExample extends Application {
   @Override
   public void start(Stage stage) throws FileNotFoundException {
      //Creating an image
	  FileInputStream fis = new FileInputStream("C:/Apache24/htdocs/javafx/images/loading_image.jpg");
      Image image = new Image(fis, 250, 300, false, false);

      //Setting the image view
      ImageView imageView = new ImageView(image);

      //Setting the position of the image
      imageView.setX(50);
      imageView.setY(25);

      //Creating a Group object
      Group root = new Group(imageView);

      //Creating a scene object
      Scene scene = new Scene(root, 600, 500);

      //Setting title to the Stage
      stage.setTitle("Loading an image");

      //Adding scene to the stage
      stage.setScene(scene);

      //Displaying the contents of the stage
      stage.show();
   }
   public static void main(String args[]) {
      launch(args);
   }
}
使用以下命令,从命令提示符编译并执行已保存的 java 文件。
Compile and execute the saved java file from the command prompt using the following commands.
javac --module-path %PATH_TO_FX% --add-modules javafx.controls ResizedImageExample.java
java --module-path %PATH_TO_FX% --add-modules javafx.controls ResizedImageExample
执行后,以上程序将生成一个 JavaFX 窗口,如下所示 −
On executing, the above program generates a JavaFX window as follows −
Multiple Views of an Image
在某些情况下,应用程序要求图像以不同的方式显示:不同尺寸、更好的质量、缩放后等等。
In some cases, an application requires an image to be displayed in different ways: with different dimensions, with better quality, after scaling, etc.
除了每次需要 Image 的不同视图时创建一个新应用程序,JavaFX 还允许您在同一场景中为一个图像设置多个视图。使用 Image 类加载图像后,可以通过多次实例化 ImageView 类来创建多个 ImageView 对象。
Instead of creating a new application every time a different view of Image is needed, JavaFX allows you to set multiple views for an image in the same scene. Once an image is loaded using the Image class, multiple ImageView objects can be created by instantiating the ImageView class multiple times.
ImageView 类是一个 JavaFX Node,它绘制使用 Image 类加载的图像。该类可以在 Application 类的 start() 方法中多次实例化,以显示图像的多个视图。
The ImageView class is a JavaFX Node that paints images that are loaded using the Image class. This class can be instantiated multiple times in a the start() method of Application class in order to display multiple views of an image.
这些多个视图的大小、质量可以不同,也可以是原件的精确副本。
These multiple views can vary in their sizes, quality or be the exact copy of the original.
但是,要做到这一点,您需要传递一个 Image 对象或源图像的 URL 字符串。创建 ImageView 对象的语法如下 −
However, to do so, you need to pass an Image object or a URL string of the source image. The syntax to create an ImageView object is as follows −
Syntax
// A new ImageView object is allocated
ImageView = new ImageView()

// ImageView object is allocated using
// the given Image object
ImageView imageview = new ImageView(Image image)

// ImageView object is allocated using
// the image loaded from a URL
ImageView imageview = new ImageView(String URL)
Example
以下程序是一个示例,演示了如何在 JavaFX 的场景中为一个图像设置不同的视图。
The following program is an example that demonstrates how to set various views for an image in a scene in JavaFX.
将此代码另存为名为 MultipleViews.java 的文件。
Save this code in a file with the name MultipleViews.java.
import java.io.FileInputStream;
import java.io.FileNotFoundException;
import javafx.application.Application;
import javafx.scene.Group;
import javafx.scene.Scene;
import javafx.scene.image.Image;
import javafx.scene.image.ImageView;
import javafx.stage.Stage;

public class MultipleViews extends Application {
   @Override
   public void start(Stage stage) throws FileNotFoundException {
      //Creating an image
      Image image = new Image(new FileInputStream("file path"));

      //Setting the image view 1
      ImageView imageView1 = new ImageView(image);

      //Setting the position of the image
      imageView1.setX(50);
      imageView1.setY(25);

      //setting the fit height and width of the image view
      imageView1.setFitHeight(300);
      imageView1.setFitWidth(250);

      //Setting the preserve ratio of the image view
      imageView1.setPreserveRatio(true);

      //Setting the image view 2
      ImageView imageView2 = new ImageView(image);

      //Setting the position of the image
      imageView2.setX(350);
      imageView2.setY(25);

      //setting the fit height and width of the image view
      imageView2.setFitHeight(150);
      imageView2.setFitWidth(250);

      //Setting the preserve ratio of the image view
      imageView2.setPreserveRatio(true);

      //Setting the image view 3
      ImageView imageView3 = new ImageView(image);

      //Setting the position of the image
      imageView3.setX(350);
      imageView3.setY(200);

      //setting the fit height and width of the image view
      imageView3.setFitHeight(100);
      imageView3.setFitWidth(100);

      //Setting the preserve ratio of the image view
      imageView3.setPreserveRatio(true);

      //Creating a Group object
      Group root = new Group(imageView1, imageView2, imageView3);

      //Creating a scene object
      Scene scene = new Scene(root, 600, 400);

      //Setting title to the Stage
      stage.setTitle("Multiple views of an image");

      //Adding scene to the stage
      stage.setScene(scene);

      //Displaying the contents of the stage
      stage.show();
   }
   public static void main(String args[]) {
      launch(args);
   }
}
使用以下命令,从命令提示符编译并执行已保存的 java 文件。
Compile and execute the saved java file from the command prompt using the following commands.
javac --module-path %PATH_TO_FX% --add-modules javafx.controls MultipleViews.java
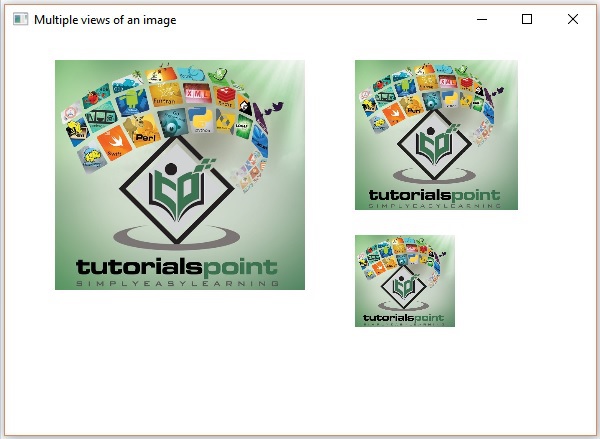
java --module-path %PATH_TO_FX% --add-modules javafx.controls MultipleViews执行后,以上程序将生成一个 JavaFX 窗口,如下所示 −
On executing, the above program generates a JavaFX window as follows −
Reading and Writing Image Pixels
读写图像在数据处理技术中经常见到。图像基本由排成二维网格形式的多个像素构成。它可以与人体细胞关联;因为它们包含图像中的信息。
Reading and Writing of Images are commonly seen in data processing techniques. Images are fundamentally composed of multiple pixels arranged in the form of 2-dimensional grid. It can be related to as the cell of a human body; as they contain information in an image.
因此,为了读写图像,我们通常指的是读写其像素。
So, in order to read and write images, we are usually referring to reading and writing its pixels.
JavaFX 还提供了各种类和接口(比如 WritableImage、PixelReader、PixelWriter)来读写此类图像像素。
JavaFX also provides various classes and interfaces, like WritableImage, PixelReader, PixelWriter, in order to read and write such image pixels.
WritableImage 类用于根据图像像素(由应用程序提供或从不同来源(包括文件或 URL 中的图像)通过 PixelReader 对象读取)来构建自定义图形图像。
The WritableImage class is used to construct a custom graphical image from its pixels that are supplied by an application, or read by a PixelReader objects from various sources including images from files or URLs.
JavaFX 提供了名为 PixelReader 和 PixelWriter 的接口来读写图像的像素。
JavaFX provides interfaces named PixelReader and PixelWriter to read and write pixels of an image.
Example
以下是演示如何读写图像像素的示例。在这里,我们读入图像的颜色值,并使其变暗。
Following is an example which demonstrates how to read and write pixels of an image. Here, we are reading the color value of an image and making it darker.
将此代码另存为名为 WritingPixelsExample.java 的文件。
Save this code in a file with the name WritingPixelsExample.java.
import java.io.FileInputStream;
import java.io.FileNotFoundException;
import javafx.application.Application;

import javafx.scene.Group;
import javafx.scene.Scene;

import javafx.scene.image.Image;
import javafx.scene.image.ImageView;
import javafx.scene.image.PixelReader;
import javafx.scene.image.PixelWriter;
import javafx.scene.image.WritableImage;

import javafx.scene.paint.Color;
import javafx.stage.Stage;

public class WritingPixelsExample extends Application {
   @Override
   public void start(Stage stage) throws FileNotFoundException {
      //Creating an image
      Image image = new Image(new FileInputStream("C:\\images\\logo.jpg"));
      int width = (int)image.getWidth();
      int height = (int)image.getHeight();

      //Creating a writable image
      WritableImage wImage = new WritableImage(width, height);

      //Reading color from the loaded image
      PixelReader pixelReader = image.getPixelReader();

      //getting the pixel writer
      PixelWriter writer = wImage.getPixelWriter();

      //Reading the color of the image
      for(int y = 0; y < height; y++) {
         for(int x = 0; x < width; x++) {
            //Retrieving the color of the pixel of the loaded image
            Color color = pixelReader.getColor(x, y);

            //Setting the color to the writable image
            writer.setColor(x, y, color.darker());
         }
      }
      //Setting the view for the writable image
      ImageView imageView = new ImageView(wImage);

      //Creating a Group object
      Group root = new Group(imageView);

      //Creating a scene object
      Scene scene = new Scene(root, 600, 500);

      //Setting title to the Stage
      stage.setTitle("Writing pixels ");

      //Adding scene to the stage
      stage.setScene(scene);

      //Displaying the contents of the stage
      stage.show();
   }
   public static void main(String args[]) {
      launch(args);
   }
}
使用以下命令,从命令提示符编译并执行已保存的 java 文件。
Compile and execute the saved java file from the command prompt using the following commands.
javac --module-path %PATH_TO_FX% --add-modules javafx.controls WritingPixelsExample.java
java --module-path %PATH_TO_FX% --add-modules javafx.controls WritingPixelsExample
执行后,以上程序将生成一个 JavaFX 窗口,如下所示 −
On executing, the above program generates a JavaFX window as follows −